Using the Well Editor
The Well Edit feature is used to modify well-level metadata. In particular, it can be used to assign sample records to individual wells.
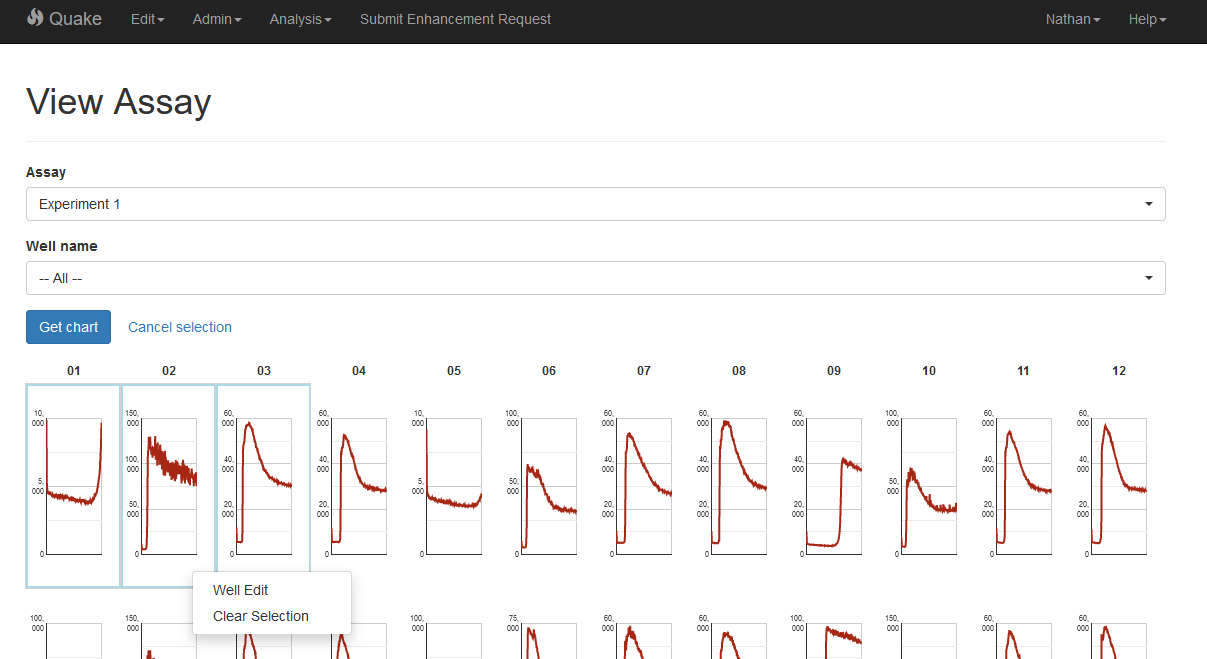
Go to Analysis > View Assay in the navigation bar. Select the name of the assay you wish to work with. Under “Well name”, leave the selection to “– All –” and press “Get chart”. This will display thumbnail fluorescence curves for all wells in the assay.
Left click on one or more wells to select them, then right-click and select “Well Edit”:
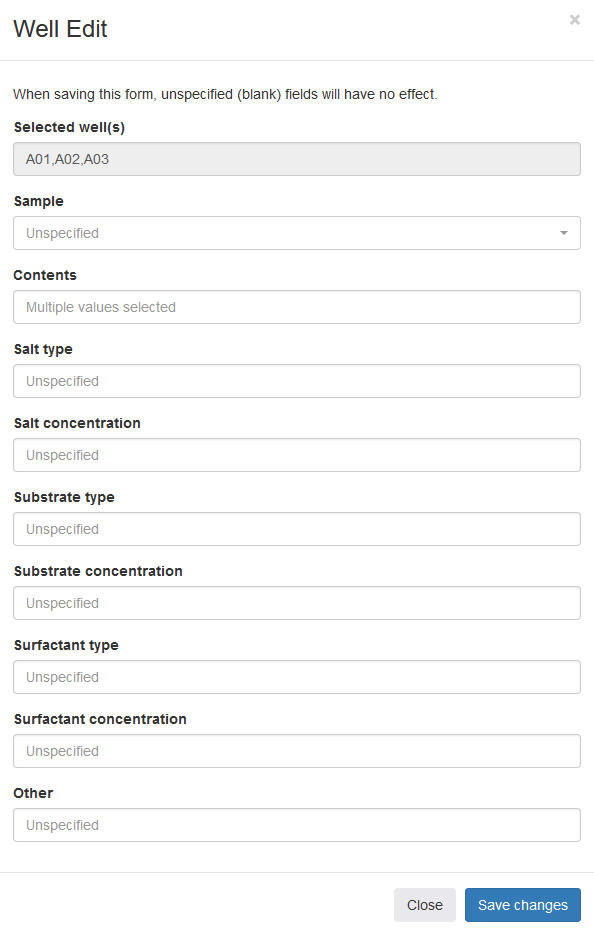
The Well Edit window displays metadata for the selected wells. If a data field is not specified for any of the selected wells, “Unspecified” will appear in the field. If multiple wells are selected and they have different values for a particular field, “Multiple values selected” will appear in the field.
Setting or changing a value of a field in Well Edit will update that field’s value for all selected wells.
Once a field has been specified for a particular well, the value of that field can be changed but not deleted using Well Edit.

